The script continues with STEP3
$OutFile="C:\quser\ad-userimport-scripts\ujuserekerkeztek.txt"
$LogFile="C:\quser\ad-userimport-scripts\adderlog.txt"
$InFile="C:\quser\ad-userimport-scripts\opslistanevekkel.txt"
$WinUsers = "C:\quser\ad-userimport-scripts\winjumpusers.txt"
# we have some test users which must not be disabled
$ToIgnore = "user1","user2","user3","master1","master2"
$GrA = @() # needed!
$GrA = import-csv $InFile # external LDAP group members
$GrB = gc $WinUsers # external LDAP group members who has additional administrative permission to be imported here
$GrC=(Get-ADGroupMember -identity jumpusers).SamAccountName # members who are already in the local AD
$Gone = $GrC | where {$GrA.uid -notcontains $_ } # members who are already in the local AD but not in the foreign AD - seems like deleted there and already left the team
$ToDelete=(Compare-Object $Gone $ToIgnore).InputObject # generating the user list who are to be deleted locally
# some checks to avoid stupid errors - too short list means we caught only some error message
$i=@(Get-Content $InFile).Length
if ( $i -lt 15 ) {
write-host "There is something wrong with the list, CHECK IT !" | Out-File $LogFile -Append
exit 1
}
$i=@(Get-Content $WinUsers).Length
if ( $i -lt 10 ) {
write-host "There is something wrong with the list, CHECK IT !" | Out-File $LogFile -Append
exit 1
}
# logging
Get-Date | Out-File $LogFile -Append
# handling users who are gone meanwhile from the external LDAP
if ( $ToDelete -ne $null ) {
$ToDelete | ForEach-Object {
#Delete-ADaccount -Member $_ -Confirm:$false # delete
#Remove-ADGroupMember -Identity jumpusers -Member $_ -Confirm:$false # removes from the group
Disable-ADAccount -identity $_ # disable the user
Write-Host "DISABLED:" $_ | Out-File $LogFile -Append
}
}
# Collecting the users into external data file who are not added yet locally. This is the trickiest part of the script because here we just find the loginID of the user. The first and the last names come from the second list! So the loginID (SAMaccount name) needs to be found in the second list and the realname comes with that from there.
$result = $GrB | Where {$GrC -NotContains $_}
$GrA.uid|ForEach-Object {
$uidja = $_
$ndx = [array]::IndexOf($GrA.uid,$uidja)
$result|Foreach-Object {
if ($_ -match $uidja ) {
$GrA.FirstName[$ndx] $GrA.LastName[$ndx]
$uidja+","+$GrA.FirstName[$ndx]+","+$GrA.LastName[$ndx] | Out-File $OutFile -Append
}
}
}
#STEP4
# This is where the safe import is happening for the new users. The password is generated locally because that can't be exported from the external LDAP so won't be identical.
[...]
2018. január 2., kedd

User import from foreign LDAP into own AD - PART1
Here is a rather complex script system I wrote. This is just for myself to remember and record my brilliant thoughts. I doubt if anyone else could use it. The goal is to get my users (including their login names and real names) from an external LDAP system and import them into my AD. (Windows based.) I'm doing the first step by using the ldapsearch from the opensource OpenLDAP package.
# STEP1: the raw list
C:\OpenLDAP\ClientTools\ldapsearch -D "cn=queryuser,dc=admin" -w "$$$$" -h 172.16.16.16 -b "dc=admin" -s sub "(&(objectclass=person)(|(gidnumber=100)(gidnumber=110)))" > C:\quser\ad-userimport-scripts\opslista.txt
# STEP2: an annoying thing here, because in the list we have both Base64 encoded and normal usernames we need to decode only the encoded ones.
$source = Get-Content "C:\quser\ad-userimport-scripts\opslista.txt" | Select-String "cn:", "displayName" #
$OutFile="c:\quser\ad-userimport-scripts\opslistanevekkel.txt"
if (Test-Path $OutFile) { Remove-Item $OutFile }
"uid,FirstName,LastName" > $OutFile
$Name_list = @()
$uid_list = @()
$source|ForEach-Object {
if ($_ -match "displayName:: ")
{
$tem = ($_ -replace "displayName:: ","")
$tam = [System.Text.Encoding]::UTF8.GetString([System.Convert]::FromBase64String($tem))
# $Base64_list += ($_ -replace "displayName:: ","")
$Name_list += $tam
}
elseif ($_ -match "displayName: ")
{
$tum = ($_ -replace "displayName: ","")
$Name_list += $tum
}
}
$source|ForEach-Object {
if ($_ -match "cn: ")
{
($_ -replace "displayName: ","")
$uid_list += ($_ -replace "cn: ","")
}
}
for($i=0;$i-le $uid_list.length-1;$i++)
{
$Name_list[$i]=($Name_list[$i] -replace " ","")
$uid_list[$i]+","+$Name_list[$i] | Out-File -filepath $OutFile -Append
}
# STEP1: the raw list
C:\OpenLDAP\ClientTools\ldapsearch -D "cn=queryuser,dc=admin" -w "$$$$" -h 172.16.16.16 -b "dc=admin" -s sub "(&(objectclass=person)(|(gidnumber=100)(gidnumber=110)))" > C:\quser\ad-userimport-scripts\opslista.txt
# STEP2: an annoying thing here, because in the list we have both Base64 encoded and normal usernames we need to decode only the encoded ones.
$source = Get-Content "C:\quser\ad-userimport-scripts\opslista.txt" | Select-String "cn:", "displayName" #
$OutFile="c:\quser\ad-userimport-scripts\opslistanevekkel.txt"
if (Test-Path $OutFile) { Remove-Item $OutFile }
"uid,FirstName,LastName" > $OutFile
$Name_list = @()
$uid_list = @()
$source|ForEach-Object {
if ($_ -match "displayName:: ")
{
$tem = ($_ -replace "displayName:: ","")
$tam = [System.Text.Encoding]::UTF8.GetString([System.Convert]::FromBase64String($tem))
# $Base64_list += ($_ -replace "displayName:: ","")
$Name_list += $tam
}
elseif ($_ -match "displayName: ")
{
$tum = ($_ -replace "displayName: ","")
$Name_list += $tum
}
}
$source|ForEach-Object {
if ($_ -match "cn: ")
{
($_ -replace "displayName: ","")
$uid_list += ($_ -replace "cn: ","")
}
}
for($i=0;$i-le $uid_list.length-1;$i++)
{
$Name_list[$i]=($Name_list[$i] -replace " ","")
$uid_list[$i]+","+$Name_list[$i] | Out-File -filepath $OutFile -Append
}
2017. október 19., csütörtök
The RPC server is unavailable
Error 0x000006BA enumerating sessionnames
Error [1722]: The RPC server is unavailable.
Ever faced this error when tried to connect to a Windows 2012 R2 server from remote to query something ? Setting up an exception for RPC in the firewall may look easy. But... in fact, it isn't. See: Win7/2008 or Windows 10/Server 2016.
Luckily for you, for Server 2012 R2 I give you the clue!
Just enable this pre-definied rule:
Remote Service Management (NP-In)
Tadaam.
And I bookmark this link here, that's a funny reading.
2017. október 4., szerda
A returning to this blog
Just a small script to myself to remember. An elegant and playful way to internally daily backup a jira+confluence+gitlab machine - and avoid all the "unlikely happen" risks.
#!/bin/bash
BACKUPLOG=/var/log/backuplog
exec > >(tee -ia $BACKUPLOG)
exec 2> >(tee -ia $BACKUPLOG >&2)
if [ ! -f /backup/MOUNTED ]; then # temp solution for further use
echo FATAL_BACKUP_NOT_MOUNTED >> $BACKUPLOG
exit 1
fi
date
echo BACKUP_STARTED
# CONFLUENCE
MYPATH=/var/lib/confluence/backups
FILE=backup-`date +%F|sed 's/-/_/g'`
cp $MYPATH/$FILE.zip /backup/confluence
[[ `ls $MYPATH|wc -l` -gt 15 ]] && find $MYPATH -mtime +15 -delete # purge old backups only if there are new ones !
[[ `ls /backup/confluence|wc -l` -gt 60 ]] && find /backup/confluence/ -type f -mtime +60 -delete
#JIRA
MYPATH=/var/lib/jira/export/
# another nice way
rsync -avh $MYPATH /backup/jira/ # no autodelete!
[ $? -ne 0 ] && echo RSYNC_ERROR_IN_BACKUP # temp set for further use
[[ `ls $MYPATH|wc -l` -gt 41 ]] && find $MYPATH -type f -mtime +20 -delete # 2 backups daily! purge old backups only if there are new ones !
[[ `ls /backup/jira|wc -l` -gt 120 ]] && find /backup/jira -mtime +60 -delete
tar -czf /backup/jira/$FILE-data.tgz /var/lib/jira/data
# MYSQL SIMPLE MIRROR BACKUP
rsync -avh --delete /var/lib/automysqlbackup/ /backup/mysql/
sleep 3
# GITLAB
/opt/gitlab/bin/gitlab-rake gitlab:backup:create
sleep 3
mv /var/opt/gitlab/backups/* /backup/gitlab/
# etc
rdiff-backup /etc /backup/etc
rdiff-backup --remove-older-than 4W /backup/etc
echo BACKUP_ENDED
date
#!/bin/bash
BACKUPLOG=/var/log/backuplog
exec > >(tee -ia $BACKUPLOG)
exec 2> >(tee -ia $BACKUPLOG >&2)
if [ ! -f /backup/MOUNTED ]; then # temp solution for further use
echo FATAL_BACKUP_NOT_MOUNTED >> $BACKUPLOG
exit 1
fi
date
echo BACKUP_STARTED
# CONFLUENCE
MYPATH=/var/lib/confluence/backups
FILE=backup-`date +%F|sed 's/-/_/g'`
cp $MYPATH/$FILE.zip /backup/confluence
[[ `ls $MYPATH|wc -l` -gt 15 ]] && find $MYPATH -mtime +15 -delete # purge old backups only if there are new ones !
[[ `ls /backup/confluence|wc -l` -gt 60 ]] && find /backup/confluence/ -type f -mtime +60 -delete
#JIRA
MYPATH=/var/lib/jira/export/
# another nice way
rsync -avh $MYPATH /backup/jira/ # no autodelete!
[ $? -ne 0 ] && echo RSYNC_ERROR_IN_BACKUP # temp set for further use
[[ `ls $MYPATH|wc -l` -gt 41 ]] && find $MYPATH -type f -mtime +20 -delete # 2 backups daily! purge old backups only if there are new ones !
[[ `ls /backup/jira|wc -l` -gt 120 ]] && find /backup/jira -mtime +60 -delete
tar -czf /backup/jira/$FILE-data.tgz /var/lib/jira/data
# MYSQL SIMPLE MIRROR BACKUP
rsync -avh --delete /var/lib/automysqlbackup/ /backup/mysql/
sleep 3
# GITLAB
/opt/gitlab/bin/gitlab-rake gitlab:backup:create
sleep 3
mv /var/opt/gitlab/backups/* /backup/gitlab/
# etc
rdiff-backup /etc /backup/etc
rdiff-backup --remove-older-than 4W /backup/etc
echo BACKUP_ENDED
date
2016. október 19., szerda
SCCM in my test lab
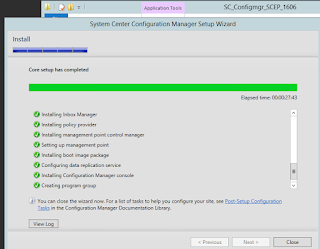
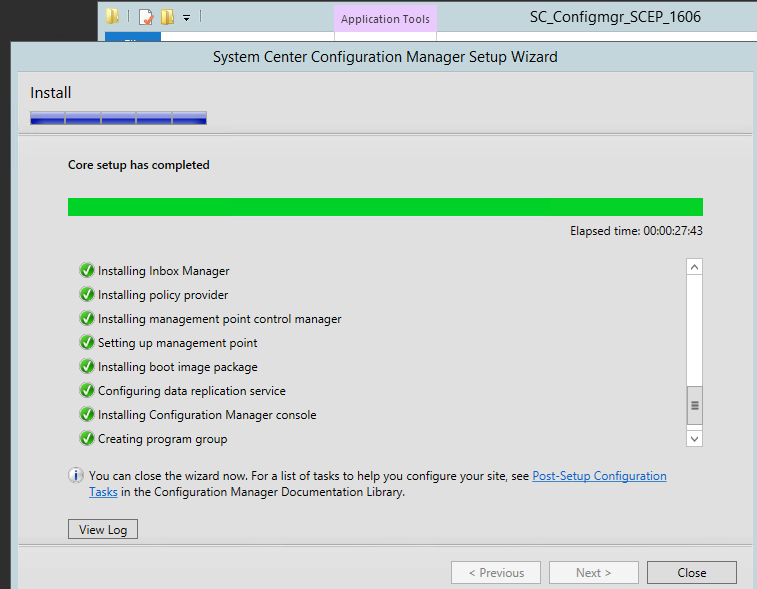
OK that's not a big deal for anyone but for me it was a three day long battle with lots of dead-ended installs, undo's and redo's. So, at long last this is the famous screen I wanted to see so much! All green! /me happy now, thanks Prajwal Desai
2016. szeptember 19., hétfő
Connect your Jira instance to a HipChat
Last year I got the chance to manage an Atlassian Jira and Confluence server. That was fun so far. But last week I was given a new task: fire up a HipChat instance and connect it with Jira. I wasted some days figuring out what to do with that exactly so to anyone getting here with Google: you are so lucky that I can tell you everything that you never find in any Atlassian docs. Here are the steps I have done.
1: download your HipChat VM instance and import it to a Vmware host. (Change RAM, NIC etc. settings according your needs.)
2: Start, login with admin / hipchat into your console (to su, type: sudo /bin/dont-blame-hipchat)
3: Set your fix IP networking with such a command: hipchat network -m static -i 192.168.100.20 -s 255.255.255.0 -g 192.168.100.254 -r 192.168.100.254
4: Open your /etc/hosts for edit and enter: 192.168.100.20 hipchat hipchat.mynetwork.local
5: In your nameserver set a new record for hipchat, e.g. hipchat.mynetwork.local (192.168.100.20)
6/a: generate a self signed SSL certificate
6/b: request a certificate from an external cert provider (see below *)
7: Finish your HC install using your (trial) licence and this certificate. (Certificate and hostname can be changed later)
8: Install HipChat connect Add-On in your Jira
9: Here comes the tricky part that drove me nuts. One can't simply force Jira connect to Hipchat because of Java engine in Jira won't trust HipChat's cert by default. You will notice that if you check catalina.out logfile in Jira: cat /opt/atlassian/jira/logs/catalina.out :
So you have two choices.
First: manually add your cert to the trusted java store. Get your server public key, detailed here. Once got your pub key into a file, execute this command: (check your paths ofcoz')
Second method: install SSL for Jira add-on. It's easier.

See attached srceenshot: it assists you installing the server cert. It creates an updated but temporary java keystore file and you have to copy it in place of the production keystore later and then restart the whole Jira.


10. Success ! (almost..)


* 7/b: in this case you'll need an external FQDN so have to own a domain name. So for example if you own mighty.org domain name, do the following:
- create a CSR for hipchat.mighty.org with your favorite linux home system.
- request a trusted certificate at a trusted 3rd party cert provider for hipchat.mighty.org
- in your INTERNAL(!) nameserver, create a new zone called hipchat.mighty.org and assing 192.168.100.20 to its @ value.
1: download your HipChat VM instance and import it to a Vmware host. (Change RAM, NIC etc. settings according your needs.)
2: Start, login with admin / hipchat into your console (to su, type: sudo /bin/dont-blame-hipchat)
3: Set your fix IP networking with such a command: hipchat network -m static -i 192.168.100.20 -s 255.255.255.0 -g 192.168.100.254 -r 192.168.100.254
4: Open your /etc/hosts for edit and enter: 192.168.100.20 hipchat hipchat.mynetwork.local
5: In your nameserver set a new record for hipchat, e.g. hipchat.mynetwork.local (192.168.100.20)
6/a: generate a self signed SSL certificate
6/b: request a certificate from an external cert provider (see below *)
7: Finish your HC install using your (trial) licence and this certificate. (Certificate and hostname can be changed later)
8: Install HipChat connect Add-On in your Jira
9: Here comes the tricky part that drove me nuts. One can't simply force Jira connect to Hipchat because of Java engine in Jira won't trust HipChat's cert by default. You will notice that if you check catalina.out logfile in Jira: cat /opt/atlassian/jira/logs/catalina.out :
/rest/hipchat/integration/latest/installation/complete [c.a.p.hipchat.rest.HipChatLinkResource] javax.net.ssl.SSLHandshakeException: sun.security.validator.ValidatorException: PKIX path building failed: sun.security.provider.certpath.SunCertPathBuilderException: unable to find valid certification path to requested target javax.net.ssl.SSLHandshakeException: sun.security.validator.ValidatorException: PKIX path building failed: sun.security.provider.certpath.SunCertPathBuilderException: unable to find valid certification path to requested target
So you have two choices.
First: manually add your cert to the trusted java store. Get your server public key, detailed here. Once got your pub key into a file, execute this command: (check your paths ofcoz')
/opt/atlassian/jira/jre/bin/keytool -import -alias hipchat.mighty.org -keystore /opt/atlassian/jira/jre/lib/security/cacerts -file /certs/mypubhipchat.crtIt asks you for a password. What the heck, what kind of password, you might ask! That is the default password for Java cert storage and hopefully nobody changed it in your system, so enter: changeit for password.
Second method: install SSL for Jira add-on. It's easier.

See attached srceenshot: it assists you installing the server cert. It creates an updated but temporary java keystore file and you have to copy it in place of the production keystore later and then restart the whole Jira.


10. Success ! (almost..)


* 7/b: in this case you'll need an external FQDN so have to own a domain name. So for example if you own mighty.org domain name, do the following:
- create a CSR for hipchat.mighty.org with your favorite linux home system.
- request a trusted certificate at a trusted 3rd party cert provider for hipchat.mighty.org
- in your INTERNAL(!) nameserver, create a new zone called hipchat.mighty.org and assing 192.168.100.20 to its @ value.
2016. július 26., kedd
Howto setup Icinga2 and Icingaweb on CentOS
On your newly installed CentOS server:
# this is my network setup for my own usage, won't fit yours :)
cat /etc/sysconfig/network-scripts/ifcfg-eth0
TYPE="Ethernet"
BOOTPROTO="static"
DEFROUTE="yes"
IPV4_FAILURE_FATAL="no"
NAME="eth0"
UUID="2ef9cace-1428-4dbf-aac7-7993463c359a"
DEVICE="eth0"
ONBOOT="yes"
IPADDR=192.168.183.235
NETMASK=255.255.254.0
NETWORKING=yes
HOSTNAME=s1
GATEWAY=192.168.183.254
NM_CONTROLLED=no
yum -y install deltarpm
yum -y install wget net-tools bind-utils gcc mc
setenforce 0 # :(
mcedit /etc/selinux/config
>> change enabled to SELINUX=disabled or SELINUX=permissive
yum -y update && yum -y upgrade
yum install -y epel-release
rpm --import http://packages.icinga.org/icinga.key
wget http://packages.icinga.org/epel/ICINGA-release.repo -O /etc/yum.repos.d/ICINGA-release.repo
yum makecache
yum install -y nagios-plugins-all icinga2 icinga2-ido-mysql icinga-idoutils-libdbi-mysql
yum install -y httpd php-cli php-pear php-xmlrpc php-xsl php-pdo php-soap php-gd php-ldap
mcedit /etc/php.ini
>> set date.timezone = Europe/YOURZONE
systemctl enable httpd && systemctl start httpd
yum install -y mariadb-server
systemctl start mariadb
systemctl enable mariadb
netstat -nlp | grep 3306 #(check if it runs)
mysql -u root
> use mysql;
> update user set password=PASSWORD("root_password") where User='root';
> flush privileges;
> exit
systemctl restart mariadb
mysql -u root -p
>CREATE DATABASE icinga2;
>GRANT SELECT, INSERT, UPDATE, DELETE, DROP, CREATE VIEW, INDEX, EXECUTE ON icinga2.* TO 'icinga2'@'localhost' IDENTIFIED BY 'icinga2_password';
>flush privileges;
>exit
mysql -u root -p icinga2 < /usr/share/icinga2-ido-mysql/schema/mysql.sql
mcedit /etc/icinga2/features-available/ido-mysql.conf
>> change:   user = "icinga2"
>>  password = "icinga2_password"
>>  host = "localhost"
>>  database = "icinga2"
systemctl enable icinga2 && systemctl start icinga2
tail -f /var/log/icinga2/icinga2.log #(check if it runs)
icinga2 feature enable command
icinga2 feature list # (to check)
systemctl restart icinga2
yum -y install icingaweb2 icingacli
grep icingaweb2 /etc/group #check if it's icingaweb2:x:990:apache
touch /var/www/html/index.html
chown apache /var/www/html/index.html
icingacli setup config directory --group icingaweb2
icingacli setup token create # get the token to the clipboard
icingacli setup token show # in case you missed it
systemctl restart httpd
# open a browser and type the IP address or FQDN of your server. That will be icinga.infokom.local for my case.
#next, next, you should see everything green

>authentication : database
>Database type: MySQL
>Host: localhost
>Database name: icingaweb2
>Username: myself
>Password: *********
>Character set: utf8
#rest of the web based setup detailed here with screenshots:
#
#Now it's time to add your first node to your server.
#On the server, run:
icinga2 node wizard
Welcome to the Icinga 2 Setup Wizard!

We'll guide you through all required configuration details.

Please specify if this is a satellite setup ('n' installs a master setup) [Y/n]: n
Starting the Master setup routine...
Please specifiy the common name (CN) [icinga.infokom.local]: Press Enter
Checking for existing certificates for common name 'icinga.infokom.local'...
Certificates not yet generated. Running 'api setup' now.
information/cli: Generating new CA.
information/base: Writing private key to '/var/lib/icinga2/ca/ca.key'.
information/base: Writing X509 certificate to '/var/lib/icinga2/ca/ca.crt'.
information/cli: Generating new CSR in '/etc/icinga2/pki/icinga.infokom.local.csr'.
information/base: Writing private key to '/etc/icinga2/pki/icinga.infokom.local.key'.
information/base: Writing certificate signing request to '/etc/icinga2/pki/icinga.infokom.local.csr'.
information/cli: Signing CSR with CA and writing certificate to '/etc/icinga2/pki/icinga.infokom.local.crt'.
information/cli: Copying CA certificate to '/etc/icinga2/pki/ca.crt'.
Generating master configuration for Icinga 2.
information/cli: Adding new ApiUser 'root' in '/etc/icinga2/conf.d/api-users.conf'.
information/cli: Enabling the 'api' feature.
Enabling feature api. Make sure to restart Icinga 2 for these changes to take effect.
information/cli: Dumping config items to file '/etc/icinga2/zones.conf'.
information/cli: Created backup file '/etc/icinga2/zones.conf.orig'.
Please specify the API bind host/port (optional):Press Enter
Bind Host []: Press Enter
Bind Port []: Press Enter
information/cli: Created backup file '/etc/icinga2/features-available/api.conf.orig'.
information/cli: Updating constants.conf.
information/cli: Created backup file '/etc/icinga2/constants.conf.orig'.
information/cli: Updating constants file '/etc/icinga2/constants.conf'.
information/cli: Updating constants file '/etc/icinga2/constants.conf'.
information/cli: Updating constants file '/etc/icinga2/constants.conf'.
Done.
# check the output if it's OK
egrep 'NodeName|TicketSalt' /etc/icinga2/constants.conf
mcedit /etc/icinga2/zones.conf
# change the string NodeName to your FQDN, in my case:
cat /etc/icinga2/zones.conf
object Endpoint "icinga.infokom.local" {
}
object Zone ZoneName {
        endpoints = [ "icinga.infokom.local" ]
}
systemctl restart icinga2.service
# to add my first client server named s2 i need a token
icinga2 pki ticket --cn 's2.infokom.local'
# On the client server:
yum install -y epel-release
rpm --import http://packages.icinga.org/icinga.key
wget http://packages.icinga.org/epel/ICINGA-release.repo -O /etc/yum.repos.d/ICINGA-release.repo
yum makecache
yum install icinga2 mc
setenforce 0 # :(
mcedit /etc/selinux/config
>> change enabled to SELINUX=disabled or SELINUX=permissive
icinga2 node wizard
Welcome to the Icinga 2 Setup Wizard!

We'll guide you through all required configuration details.

Please specify if this is a satellite setup ('n' installs a master setup) [Y/n]:Enter
Starting the Node setup routine...
Please specifiy the common name (CN) [s2.infokom.local]: Enter
Please specifiy the local zone name [s2.infokom.local]: Enter
Please specify the master endpoint(s) this node should connect to:Enter
Master Common Name (CN from your master setup): icinga.infokom.local
Do you want to establish a connection to the master from this node? [Y/n]: y
Please fill out the master connection information:Enter
Master endpoint host (Your master's IP address or FQDN): 192.168.183.235
Master endpoint port [5665]: Enter
Add more master endpoints? [y/N]:  Enter
Please specify the master connection for CSR auto-signing (defaults to master endpoint host):Enter
Host [192.168.183.235]: Enter
Port [5665]: Enter
information/base: Writing private key to '/etc/icinga2/pki/s2.infokom.local.key'.
information/base: Writing X509 certificate to '/etc/icinga2/pki/s2.infokom.local.crt'.
information/cli: Generating self-signed certifiate:
information/cli: Fetching public certificate from master (192.168.183.235, 5665):

information/cli: Writing trusted certificate to file '/etc/icinga2/pki/trusted-master.crt'.
information/cli: Stored trusted master certificate in '/etc/icinga2/pki/trusted-master.crt'.

Please specify the request ticket generated on your Icinga 2 master.
 (Hint: # icinga2 pki ticket --cn 's2.infokom.local'): faaec3b98221622841cc437ee74b09a1f44b1ab
information/cli: Processing self-signed certificate request. Ticket 'faaec3b98221622841cc437ee74b09a1f44b1ab'.

information/cli: Created backup file '/etc/icinga2/pki/s2.infokom.local.crt.orig'.
information/cli: Writing signed certificate to file '/etc/icinga2/pki/s2.infokom.local.crt'.
information/cli: Writing CA certificate to file '/etc/icinga2/pki/ca.crt'.
Please specify the API bind host/port (optional):Enter
Bind Host []: Enter
Bind Port []: Enter
Accept config from master? [y/N]: y
Accept commands from master? [y/N]: y
information/cli: Disabling the Notification feature.
Disabling feature notification. Make sure to restart Icinga 2 for these changes to take effect.
information/cli: Enabling the Apilistener feature.
Enabling feature api. Make sure to restart Icinga 2 for these changes to take effect.
information/cli: Created backup file '/etc/icinga2/features-available/api.conf.orig'.
information/cli: Generating local zones.conf.
information/cli: Dumping config items to file '/etc/icinga2/zones.conf'.
information/cli: Created backup file '/etc/icinga2/zones.conf.orig'.
information/cli: Updating constants.conf.
information/cli: Created backup file '/etc/icinga2/constants.conf.orig'.
information/cli: Updating constants file '/etc/icinga2/constants.conf'.
information/cli: Updating constants file '/etc/icinga2/constants.conf'.
Done.
# to check
grep 's2' /etc/icinga2/constants.conf
mcedit /etc/icinga2/zones.conf
# change NodeName to your local machine name, in my case it's FQDN
mcedit /etc/icinga2/zones.conf
object Endpoint "icinga.infokom.local" {
        host = "192.168.183.235"
        port = "5665"
}
object Zone "master" {
        endpoints = [ "icinga.infokom.local" ]
}
object Endpoint "s2.infokom.local" {
}
object Zone ZoneName {
        endpoints = [ "s2.infokom.local" ]
        parent = "master"
}

service icinga2 restart && service icinga2 enable
# wait a bit and back to the icinga server:
icinga2 node list
# you SHOULD see your client server NOW
Node 's2.infokom.local' (last seen: Wed Jul 27 09:36:11 2016)
    * Host 's2.infokom.local'
        * Service 'apt'
[...]
icinga2 node update-config
systemctl reload icinga2.service
Open your web GUI and see your new server, it's in PENDING state now. Wait a bit or click on CHECK NOW button in the
CHECK EXECUTION section.

Feliratkozás:
Bejegyzések (Atom)